
by Tess Machling
[A download/print PDF version can be found at the end of the paper] This paper can be cited as DOI 10.5281/zenodo.15181315
(For details of all the finds referred to, please see the recently published Snettisham Hoards volumes, which can be downloaded for free from HERE.)
Abstract
Hoard F, from the Snettisham ‘gold field’ in Norfolk, is probably one of the most intriguing hoards from this site. Comprising over 500 items, many of them broken or crushed – and apparently buried within an upturned helmet – the hoard was excavated by a metal detectorist in 1990. Sadly, only a single sketch and a note from a letter record the details of this hoard’s excavation and so the objects are all that we have to enable the understanding of it. We also do not know if these artefacts are the entirety of what was buried, nor do we know how the contents of the hoard were arranged. Nonetheless, the range of material buried in the hoard and the various unusual treatments that these objects have received can allow us to tell something of its story.


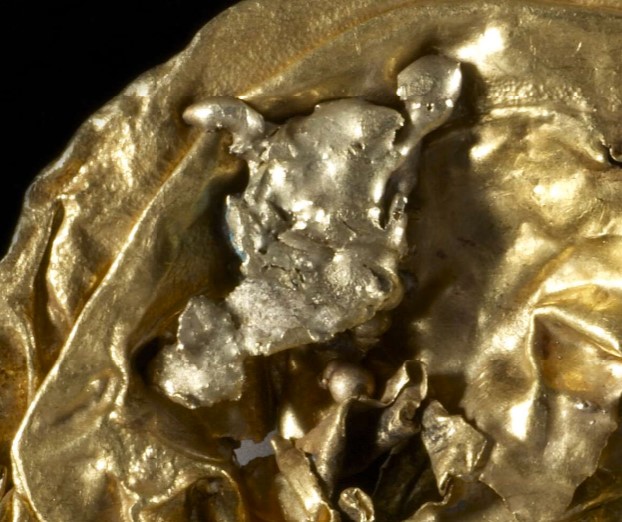
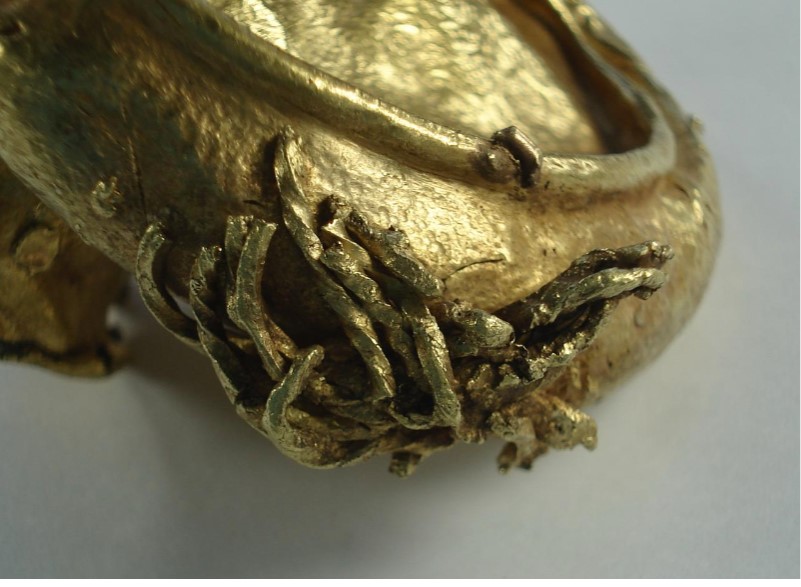


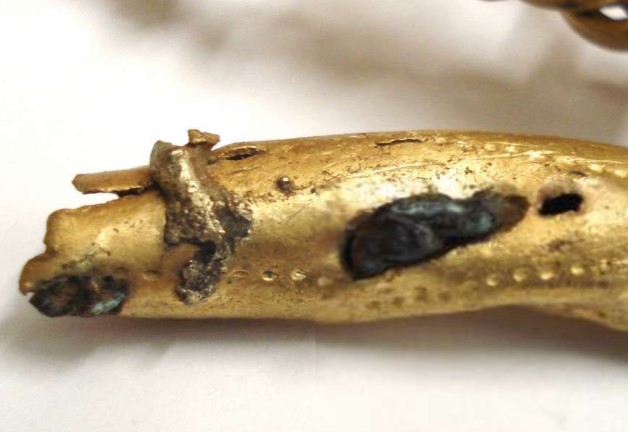
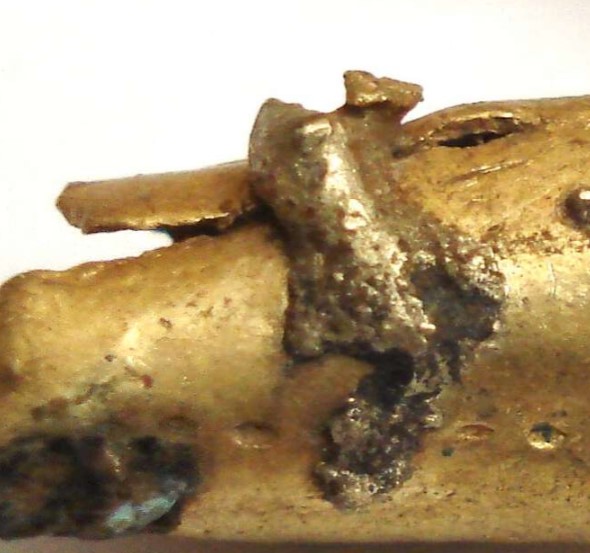
In particular, the presence of fused, melted and/or dripped on metal items from this hoard is of note (Fig. 1). Such material does not occur in either of the other ‘scrap’ hoards, B and C, but such evidence of heating does crop up in Hoards D, E and L, on scrap material pieces that have been used to alter/repair or add to torcs in these hoards (Fig. 2).
In this paper, I will argue that the pieces of this hoard that have been melted, fused and/or dripped on, are related to one another and can offer an insight into the processes that occurred both prior to, and during, the burial of Hoard F. In addition, this material also offers insights into the inter-relationship between Hoard F and Snettisham Hoards B, E and L.


Hoard F
Hoard F was located on 25th August 1990, around 30cm below the current land surface. The hoard pit was around 30cm wide and 30cm deep, and tapered slightly at the bottom. However, when the pit was archaeologically re-excavated it was clear that the pit had been overcut by the detectorist and so the precise dimensions are uncertain (Farley 2024, 124).
The biggest of the Snettisham hoards by weight at 9.2kg (Stead 2024, 8), it comprises over 500 objects all apparently contained in a copper alloy helmet (F.445). The diverse range of objects includes large numbers of wires, partial torcs, detached torc terminals, linked objects, rings and linear ingots in silver-rich, gold-rich and copper alloys (Fig. 3).
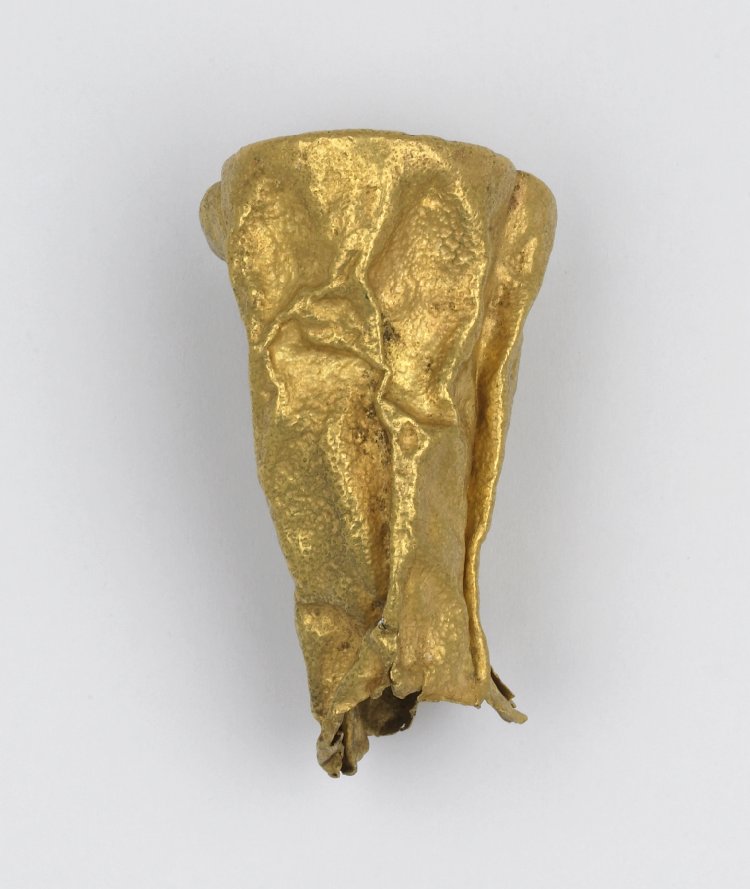
There are also nine gold coins: two Gallo Belgic A staters, two Gallo Belgic A quarter staters and five Gallo Belgic C staters. Five of the coins (one GB A stater, two GB A quarter staters and two GB C staters) were found sealed into a broken piece of tubular torc (F.53), the ends of which had been carefully folded to seal the coins into a packet. One of the staters within the packet had been cut in half.
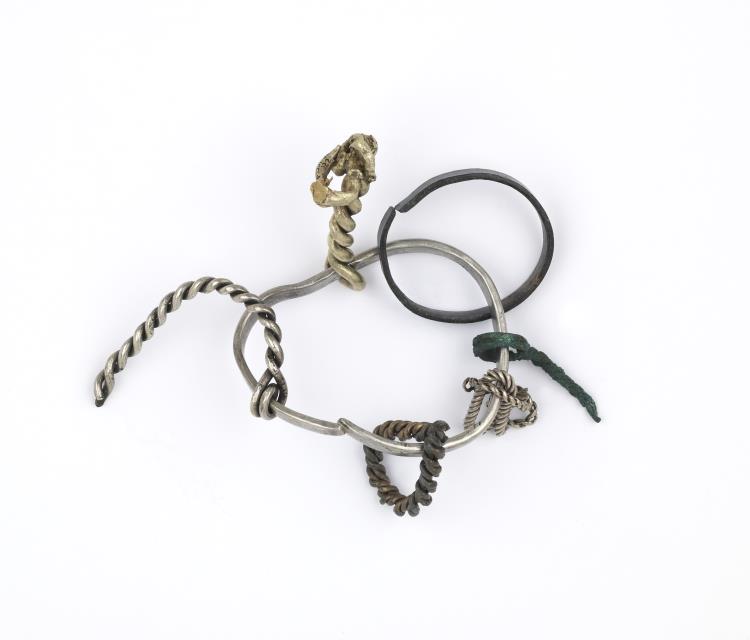


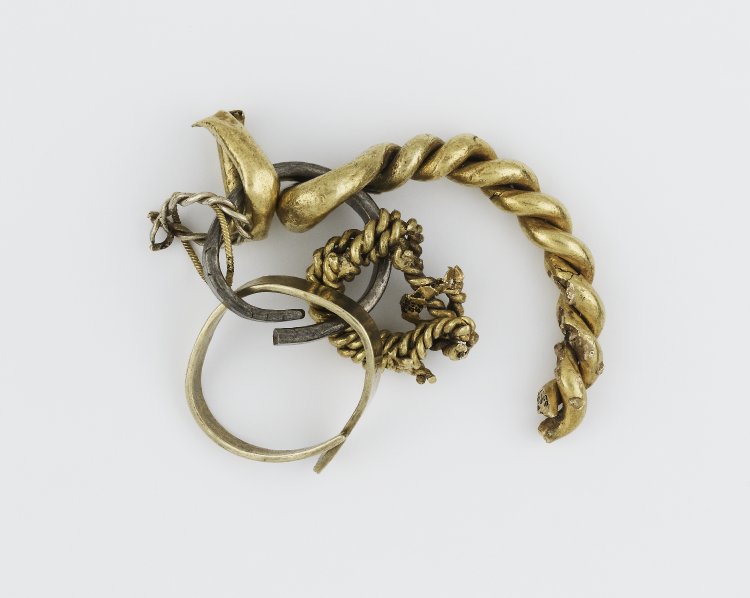

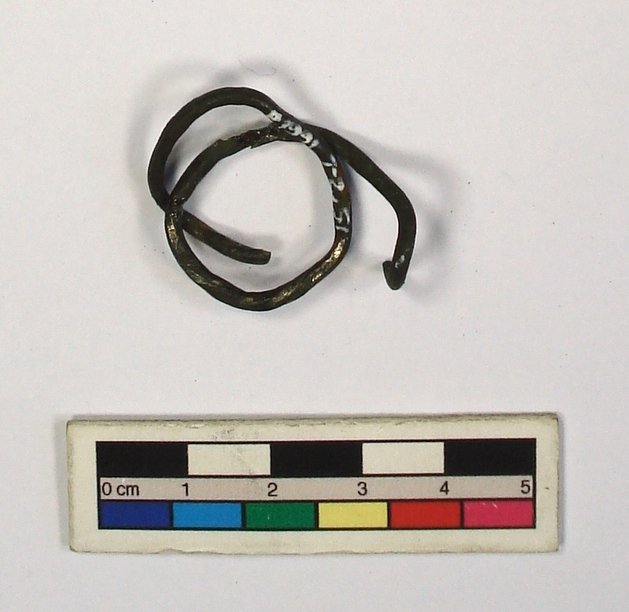


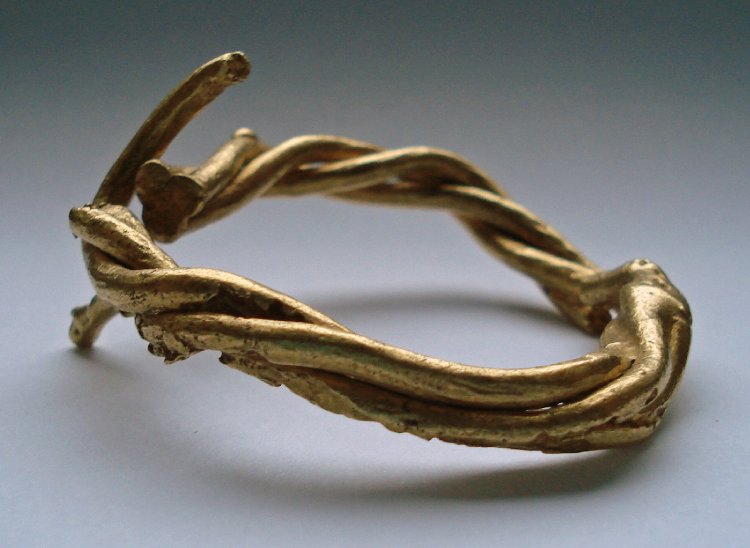
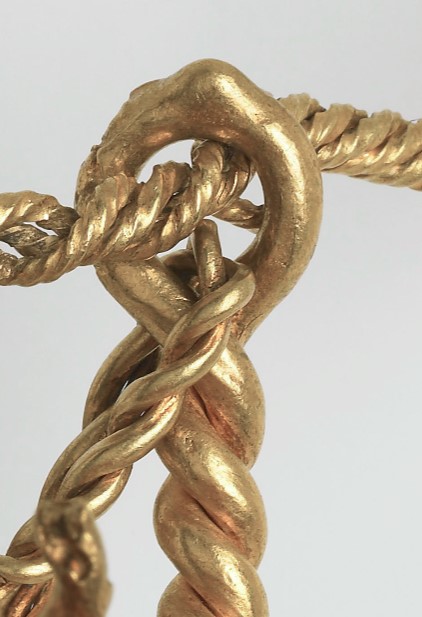
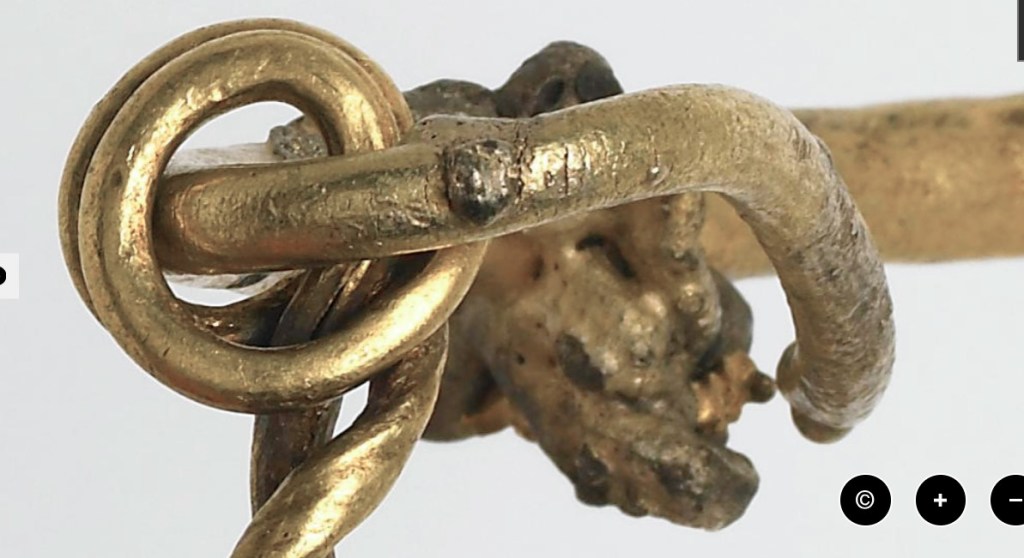
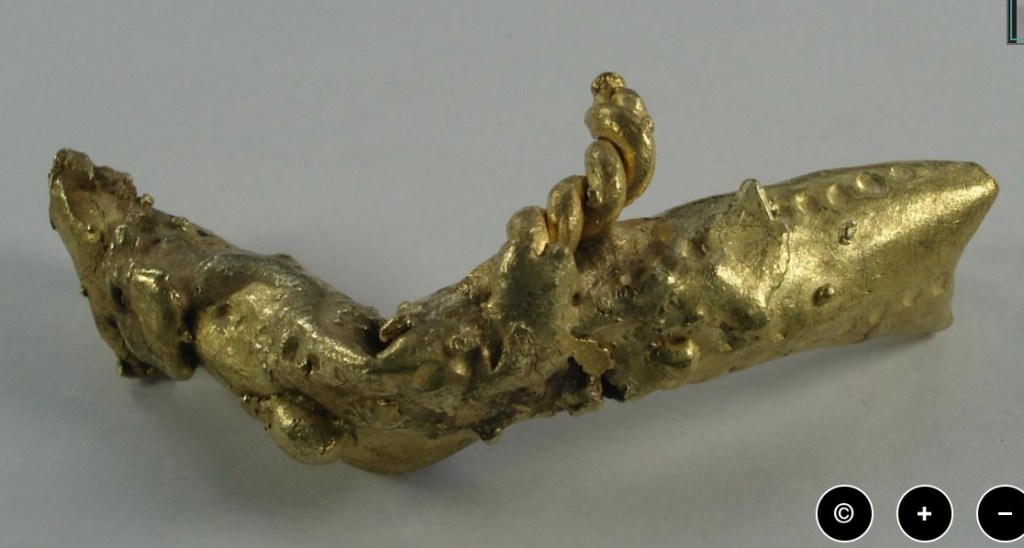
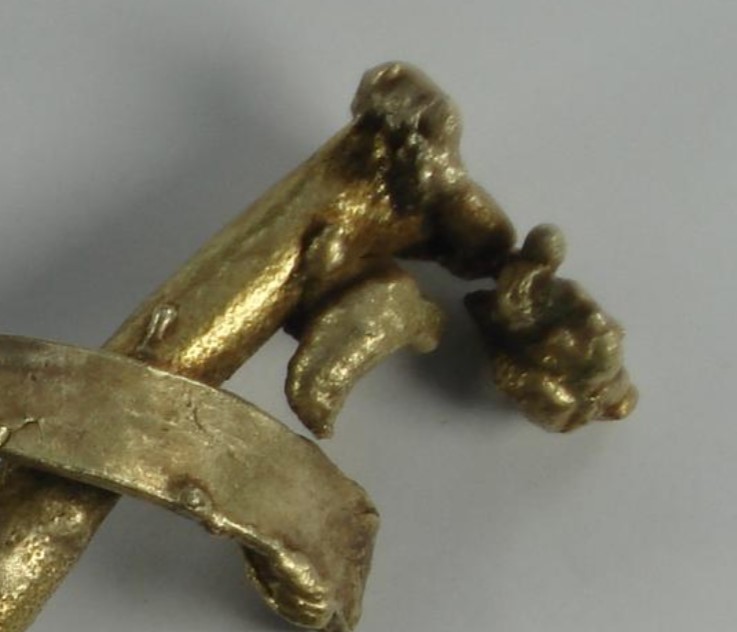
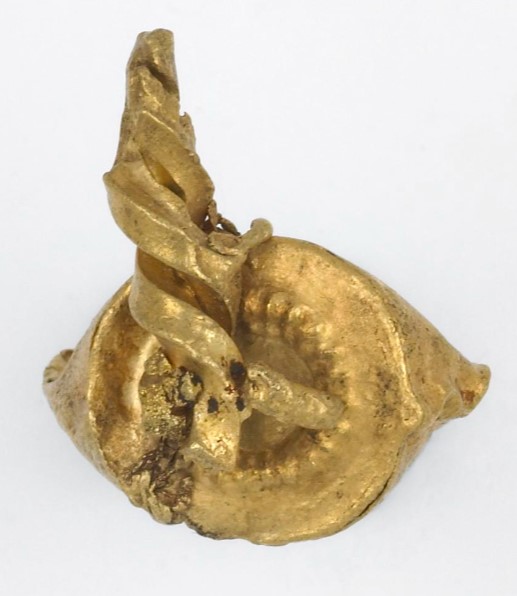
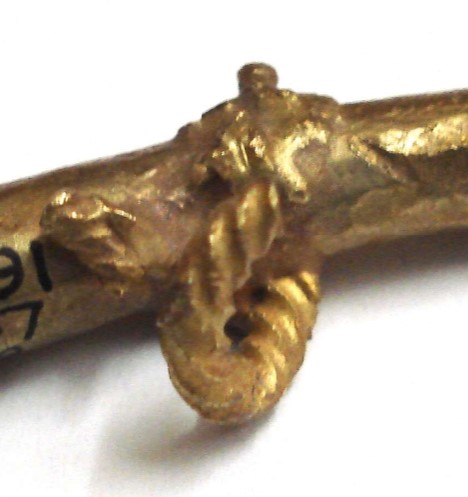
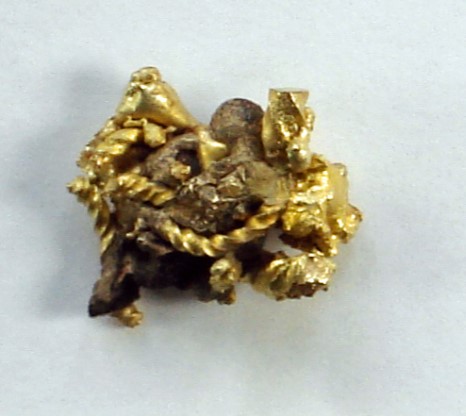
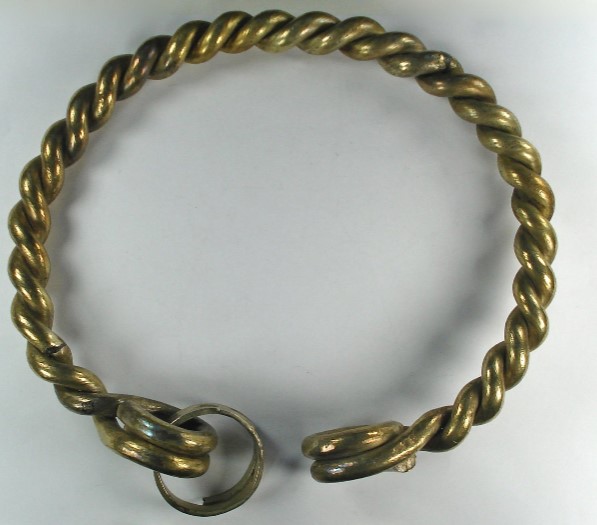
There are eight groups of linked, multi-part, silver-rich, gold-rich and copper alloy objects, including rings and pieces of torc neck ring, with and without terminals (Fig. 4). Many of these have items with fused/melted metals attached. The majority only comprise gold and silver although one of the linked groups, F.3, includes a copper alloy torc fragment and a ring. A further linked group, F.8, is comprised of only copper alloy objects and a silver-rich, gold/silver alloy torc terminal. As well as the multi-part groups, there are also several linked pairs of objects, often comprising a section of torc neck ring and a ring. Furthermore there are four multi-part linked groups of rings, two of these also include pieces of neck ring from a torc.
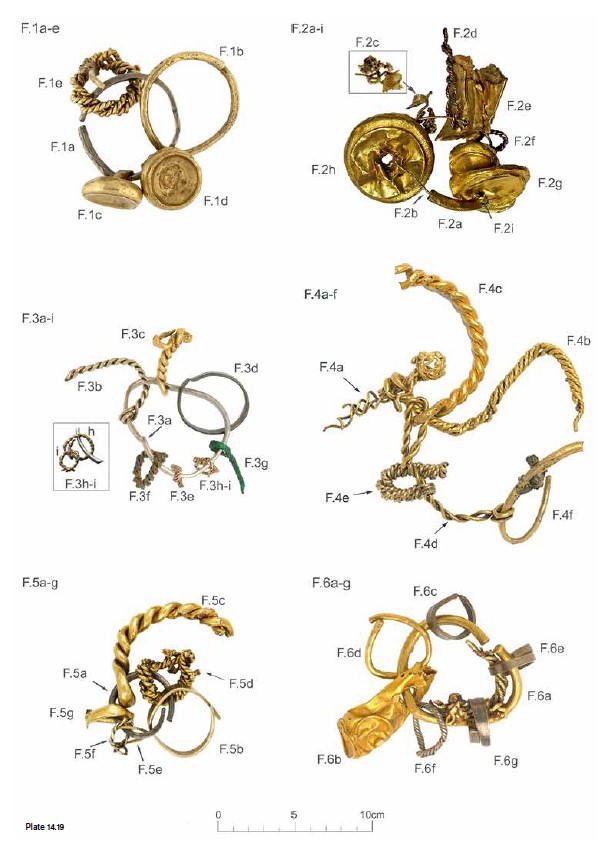
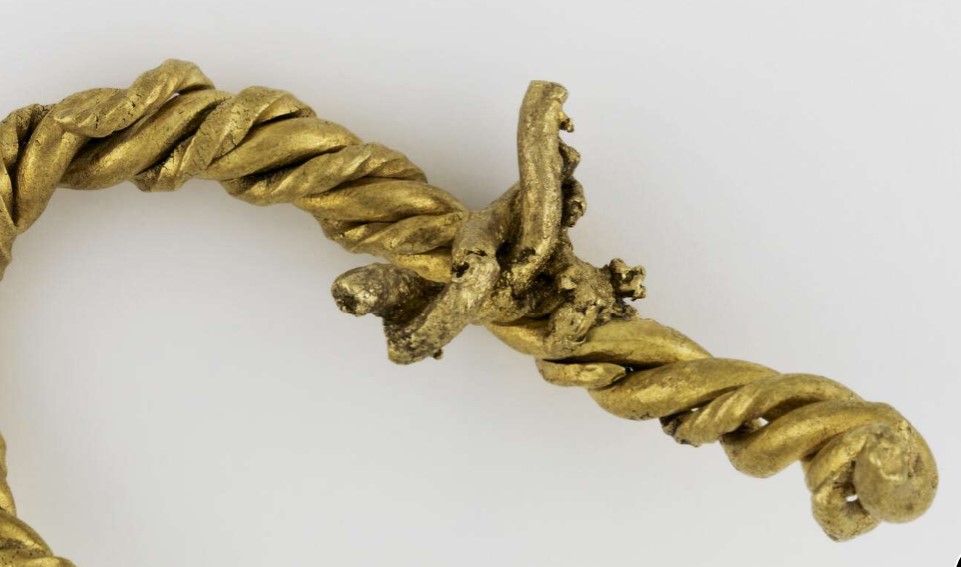
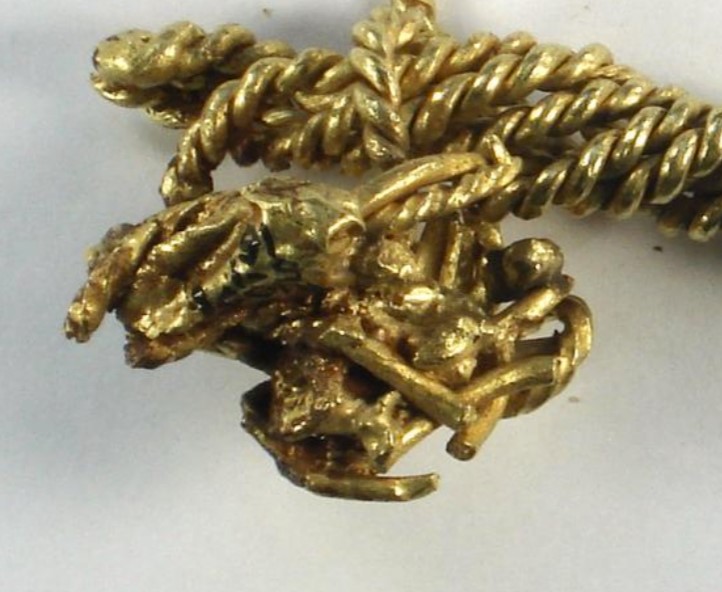
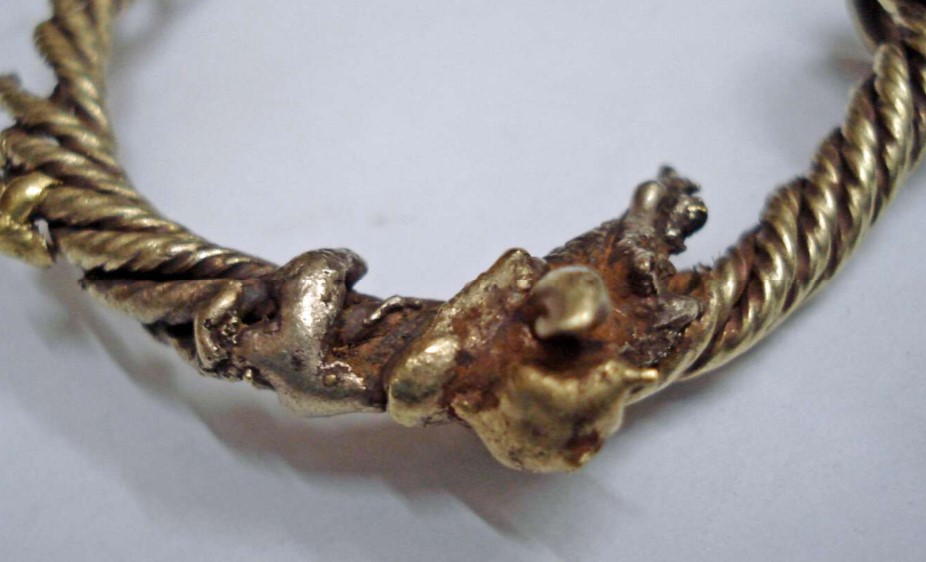
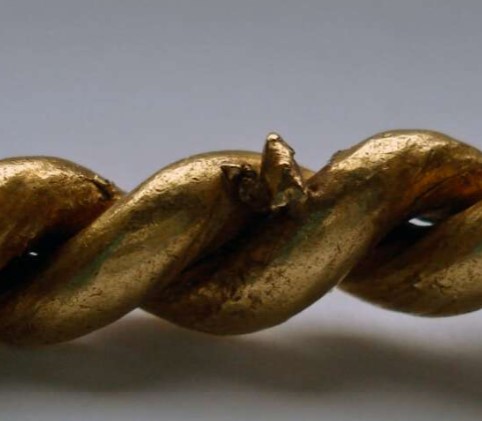
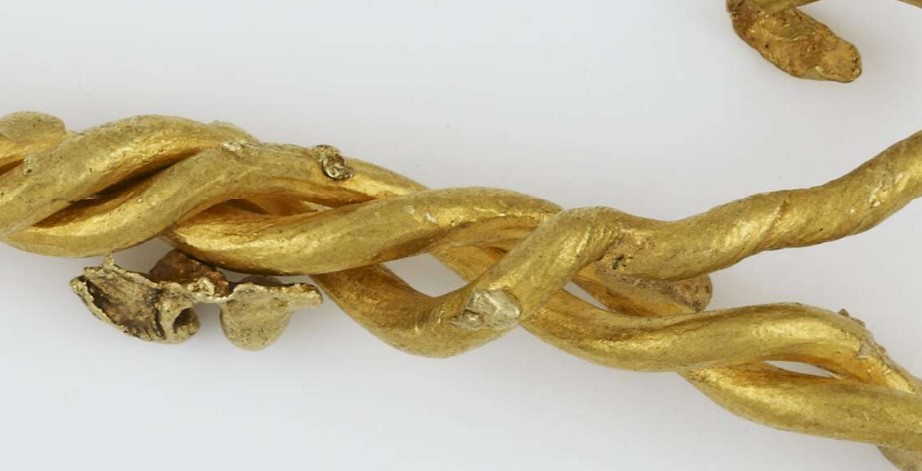
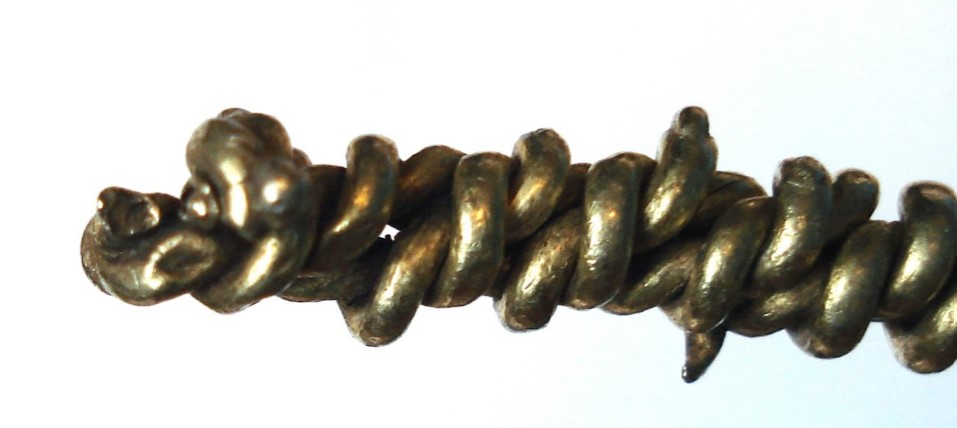
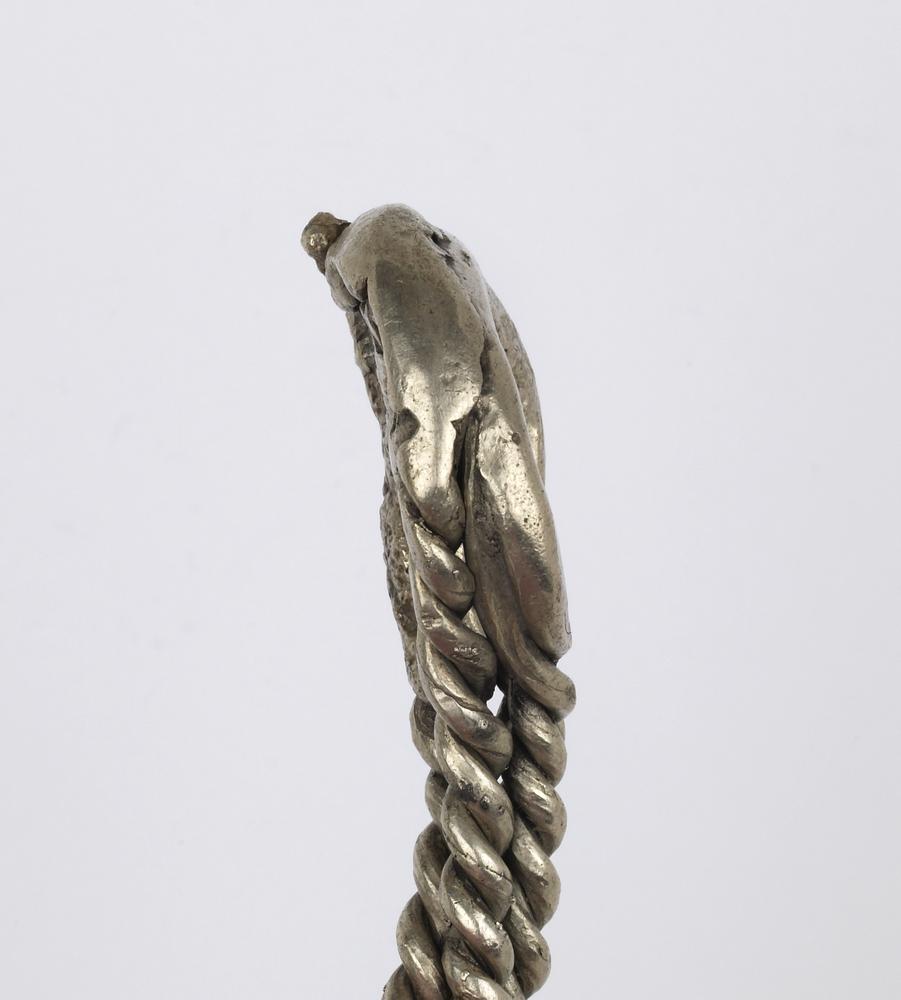
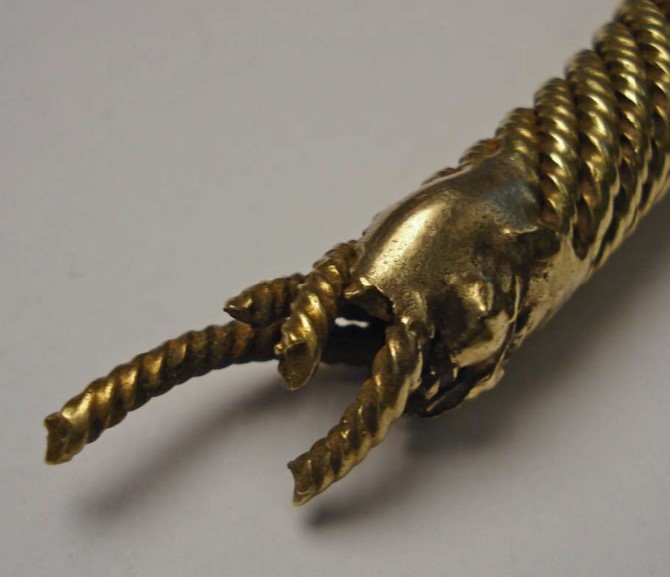
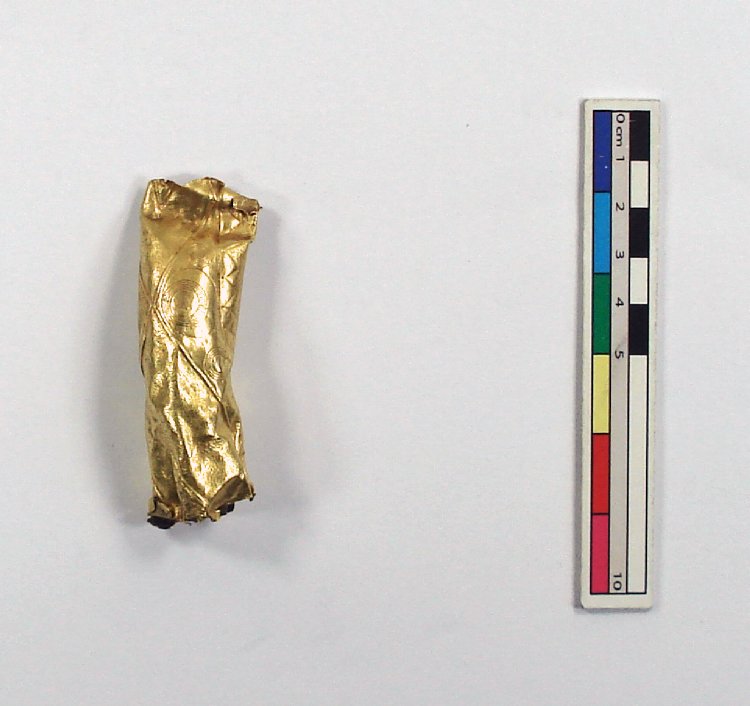
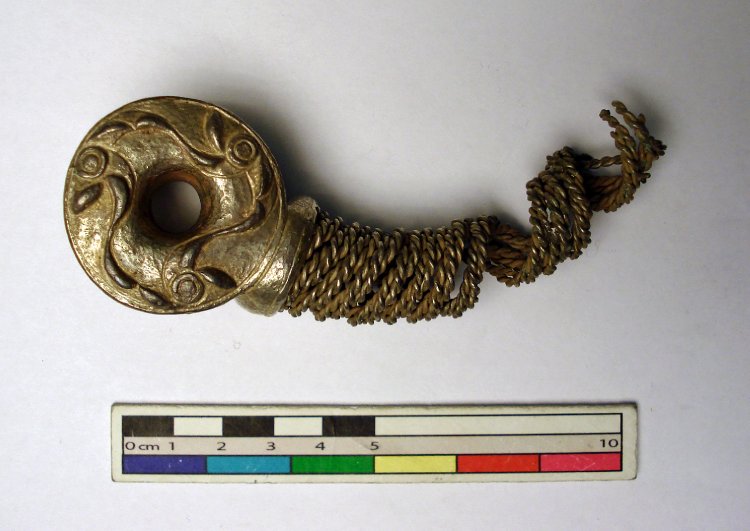
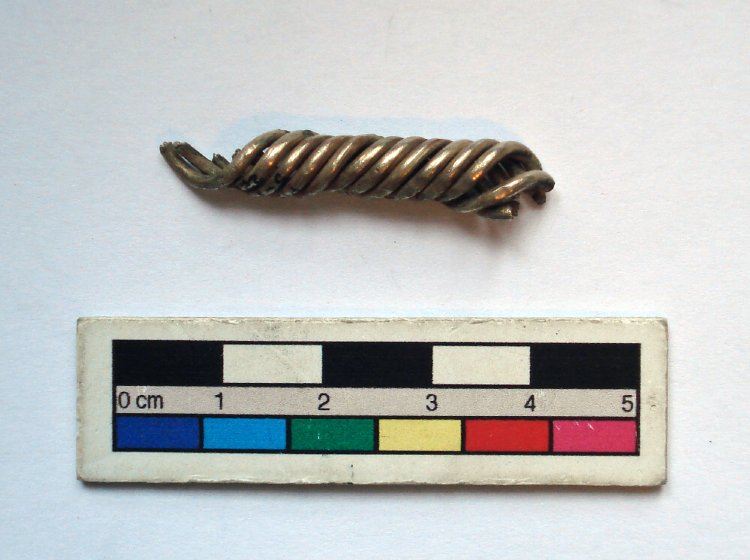
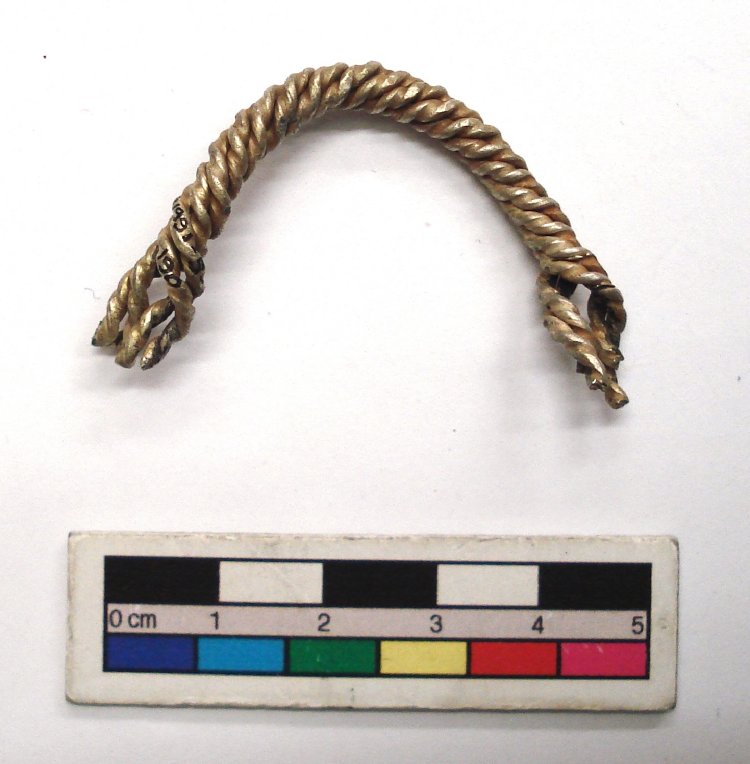
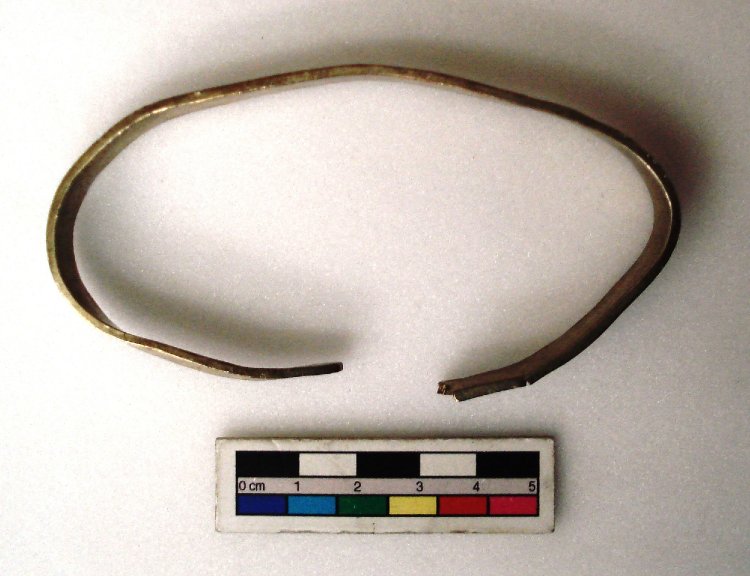
Amongst the other objects are around thirty pieces of tubular torc (Fig. 5), many of which are likely to date to at least the 3rd century and perhaps even the 4th century BC (Machling & Williamson 2023). Around 50% of the objects by number are made from hammered, gold-rich, alloys (see Meeks et al 2024, Table 17.2) and most of these gold pieces are decorated or have decorative elements.

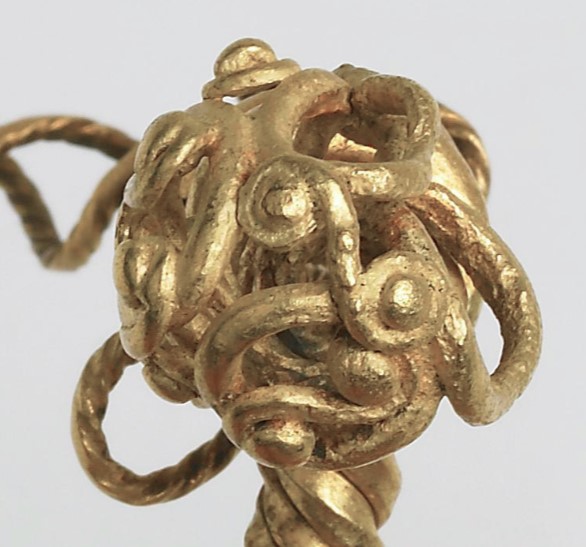
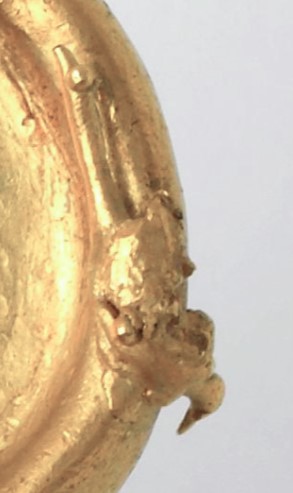
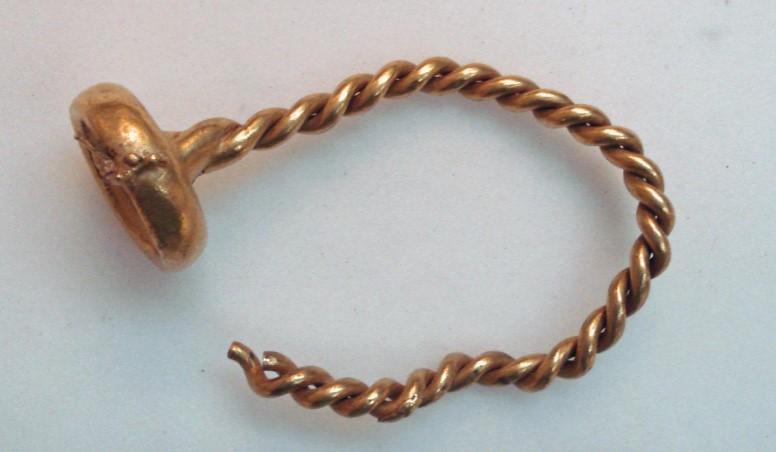
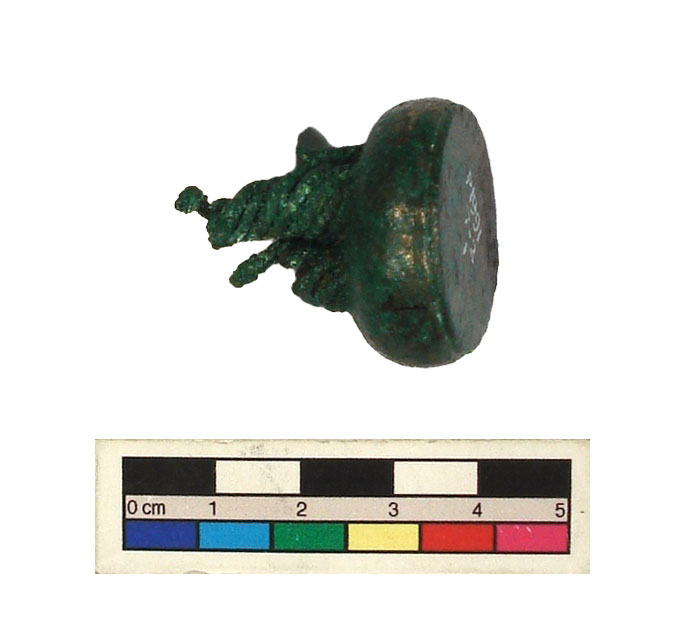
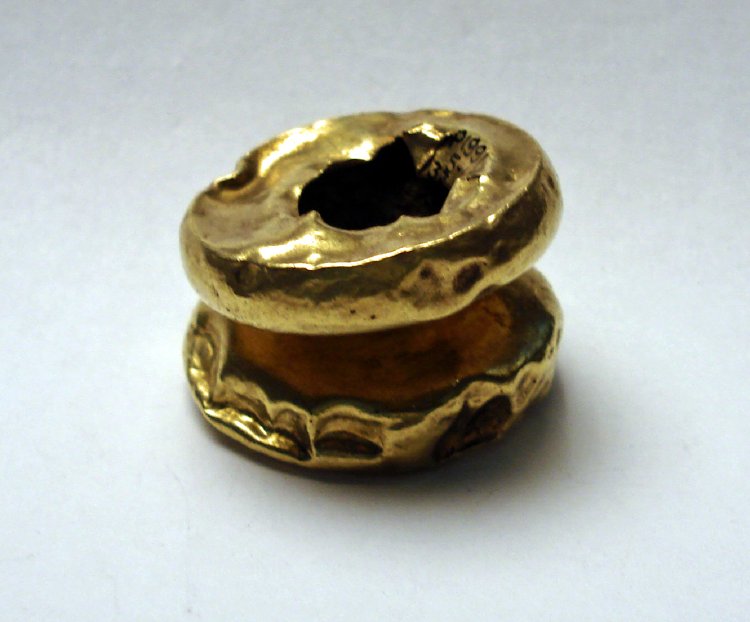
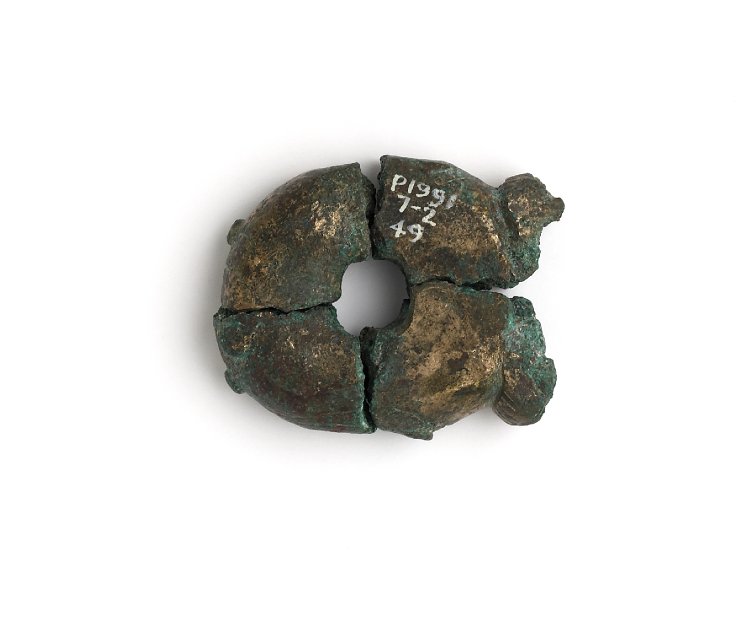
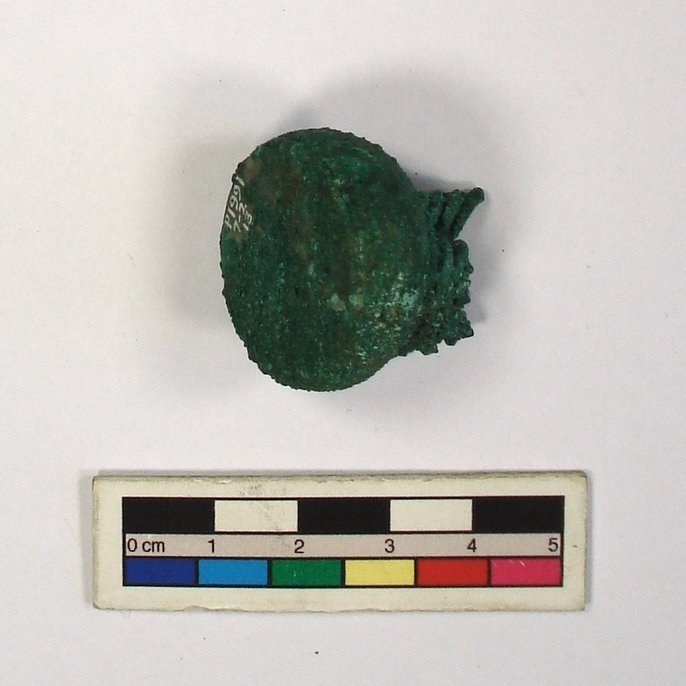
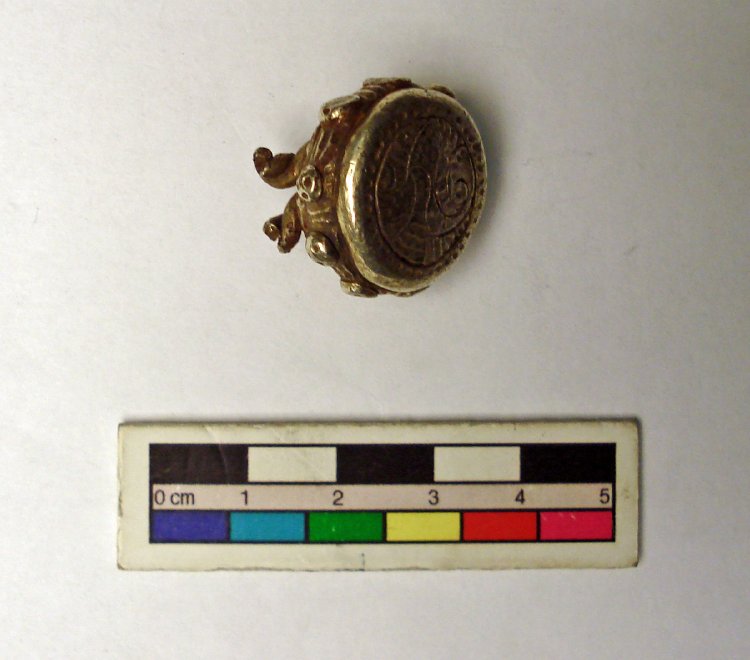
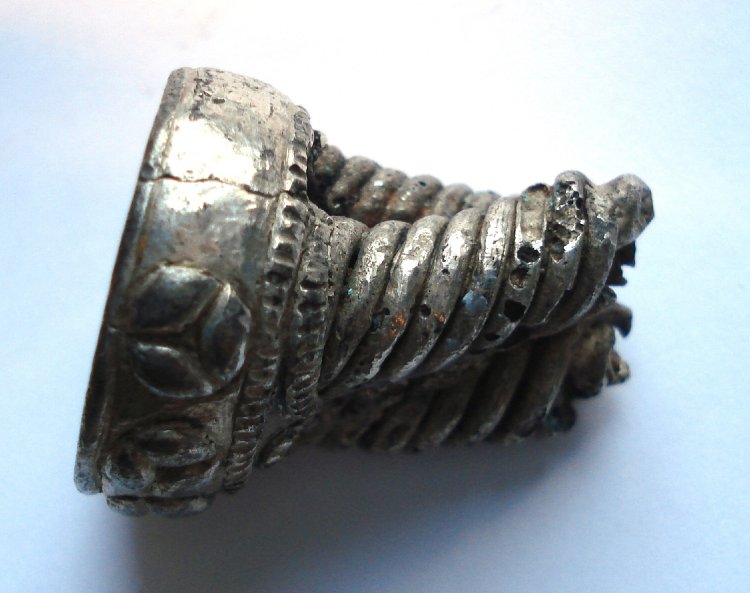
There are a handful of cast objects (Fig. 6): this technique is mainly seen in copper alloy examples, where terminals have been cast. However, in the gold/silver alloy examples, casting is mostly seen in overcast, loop terminal, torc pieces: the majority associated with multi-part linked groups. One exception is torc F.122 (Fig. 6 upper middle), which was made in gold/silver alloy, and both terminals of which are cast on. However, it does not appear that the rest of the broken neck ring was ever in the hoard.

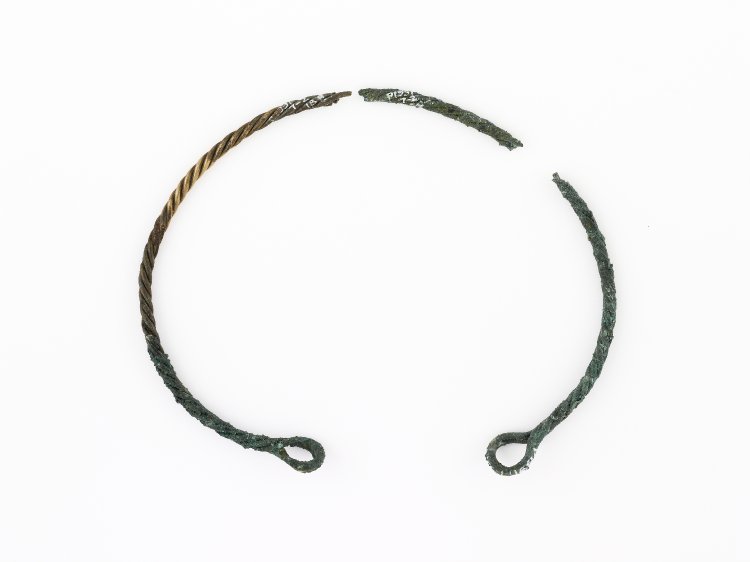
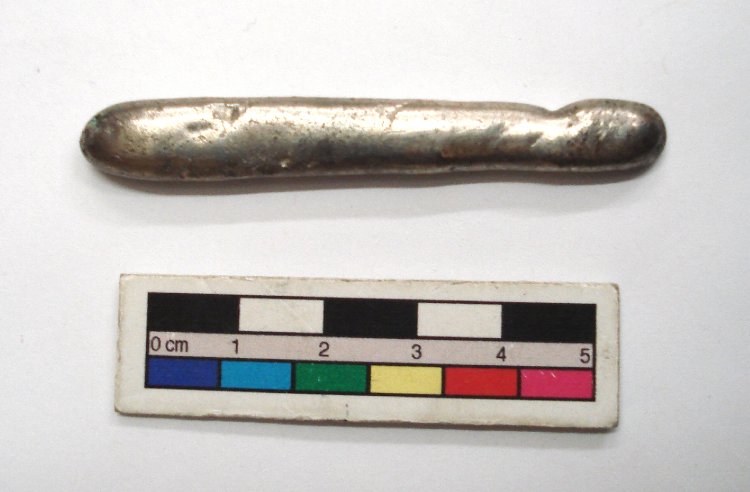
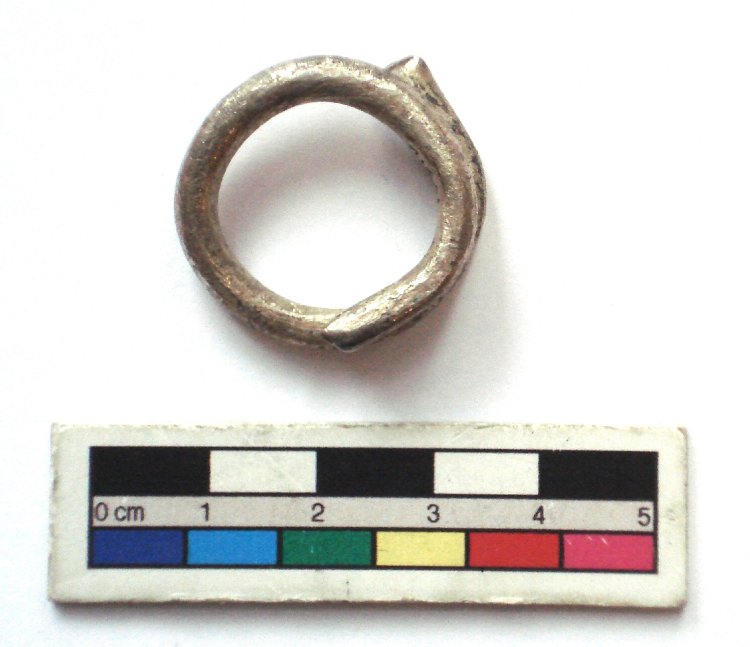
There are at least four complete torcs within the hoard, although all are fragmentary, and so it is uncertain if they became fragmented before, or after, deposition. There are also around forty rings, of varying sizes. Many of these rings are of silver-rich alloys. In addition, there are three linear ingots (F.438, F.439 and F.440), one each in silver-rich, gold-rich and copper alloys. As mentioned previously, within the hoard, many of the pieces are either fused, melted or have droplets of melted metal adhering to them.
The fused/melted or dripped on items
There are at least thirty-two items within Hoard F which have been fused, melted or which have had molten metal dripped upon them. In addition, surface finds – some from within the vicinity of Hoard F – offer another five examples. It should be noted that there may be other examples, however, it has not been possible to see all the Hoard F artefacts in person, and so identification has been carried out from photographs.
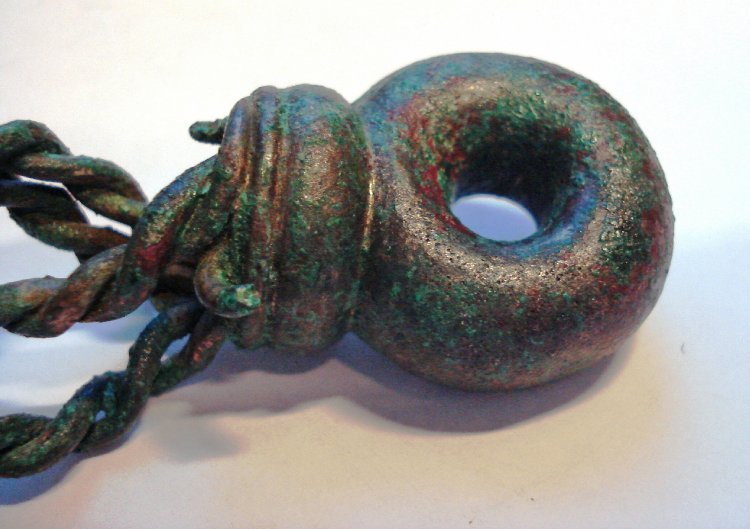
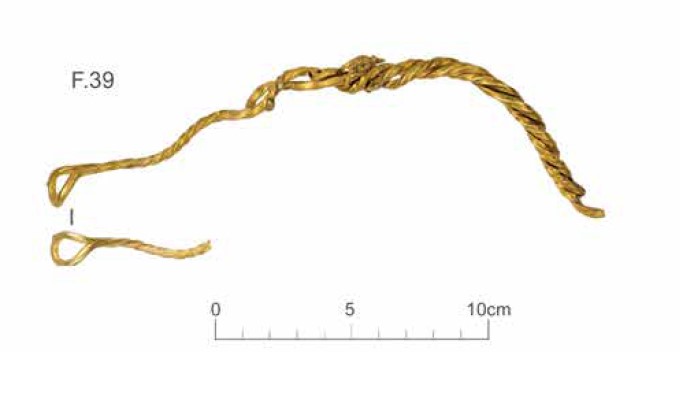
All the pieces are only partially modified, with much of the object remaining unaltered. Some pieces (e.g. D.1b, F.1e and F.5c ) have only been dripped on, some (e.g. F.7g, F.39 and F.34) are only fused in one zone, while only one piece (F. 36) is almost entirely melted. In all cases, the areas of alteration are concentrated in one or two areas, with little alteration visible in the rest of the object. As such, whatever happened to this material, the heat was inconsistent and likely localised.
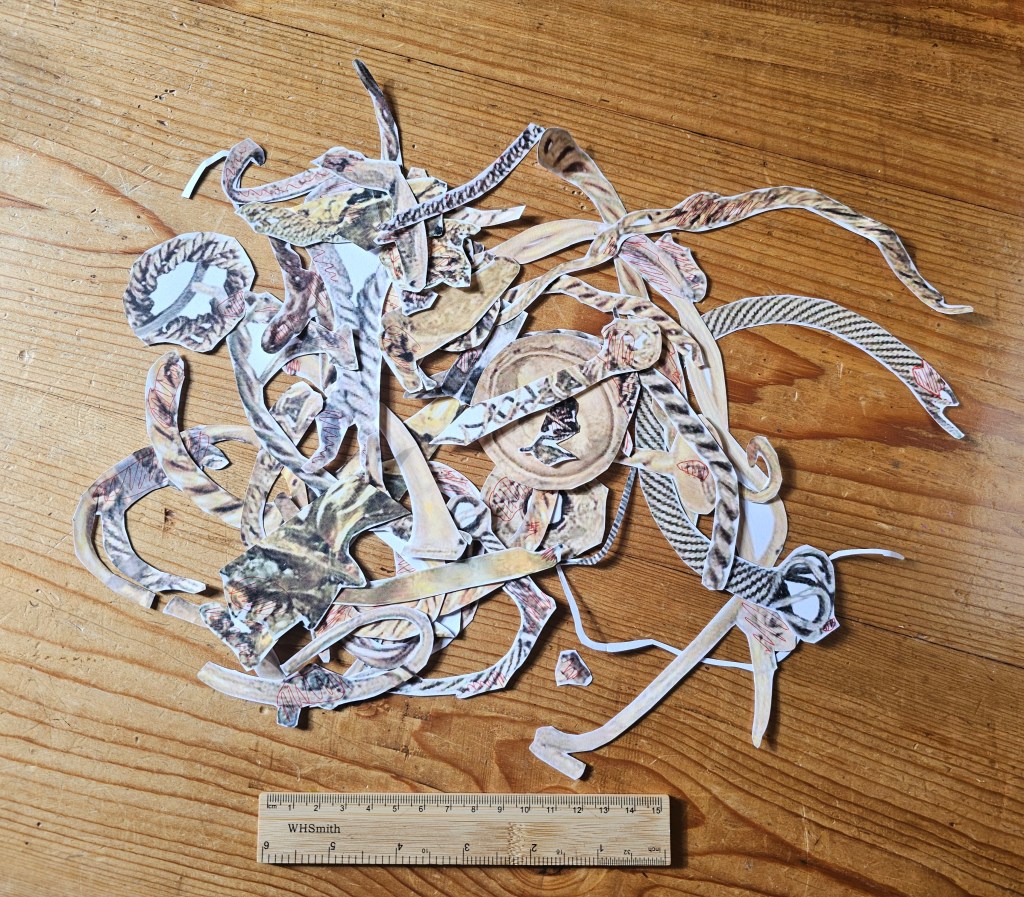
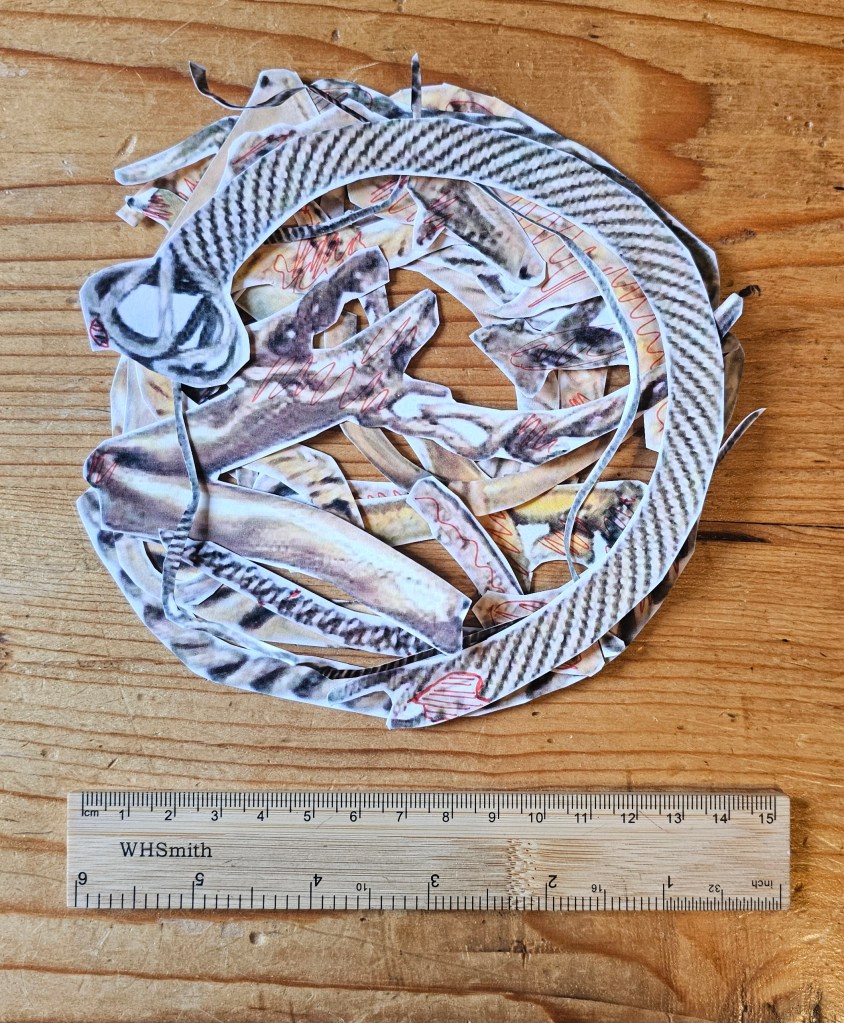
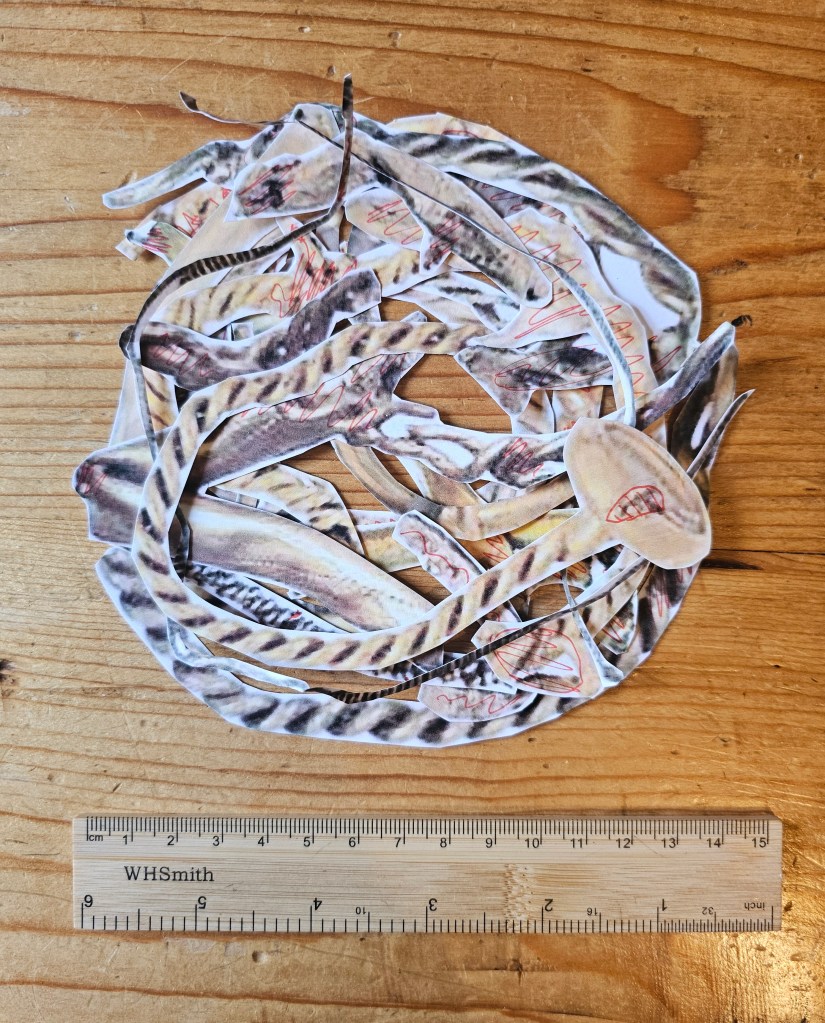
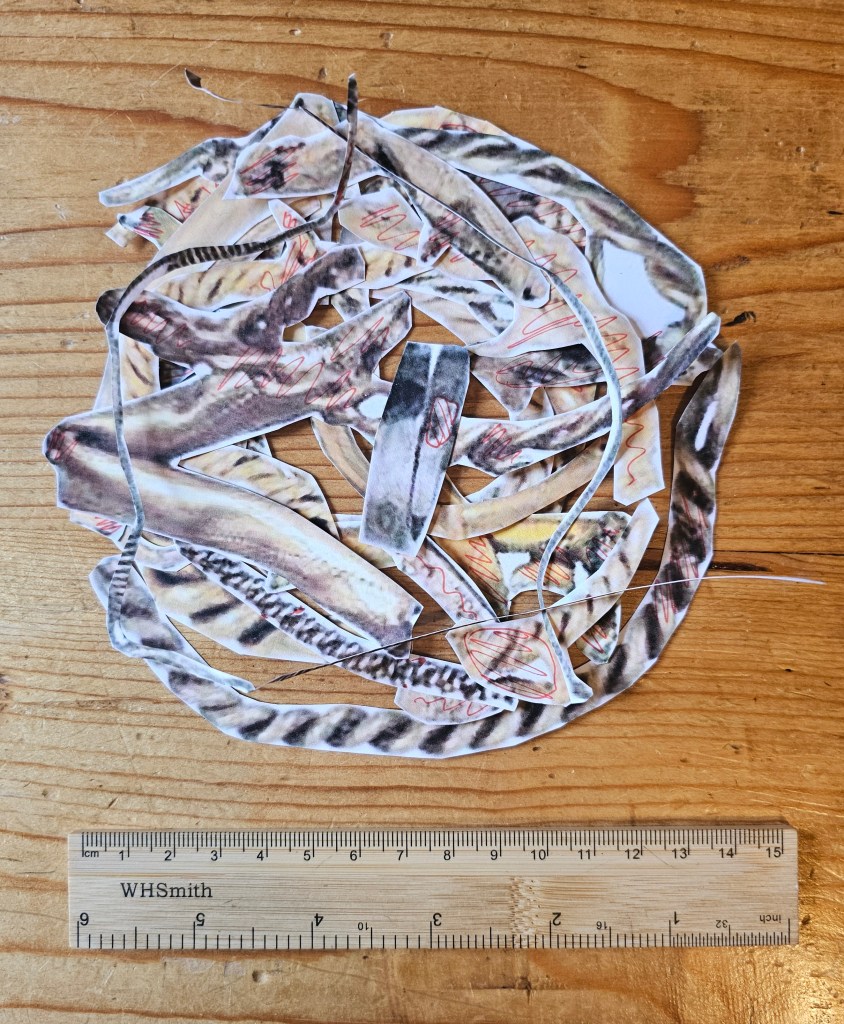
To facilitate understanding of the items, each of the fused, melted and/or dripped on objects from Hoards D, E, F and L have been printed out as 1:1 paper copies. Although obviously not three-dimensional, as the originals are, this method has proved invaluable in visualising the altered contents of the hoards (Fig. 7).
Although not apparently immediately related in form, size or weight, there are a number of similarities in the material. Firstly, all the examples are of gold/silver alloys, but of varying gold percentages. There is one small piece of copper alloy with a tiny piece of gold wire attached (F. 44) but it is uncertain if this coming together is the result of copper alloy corrosion products adhering to a piece of wire after the deposition of Hoard F, or if this is a true fused example. In addition, the size of F.44, at only 23.5mm x 3.8mm, could suggest that, even if it is fused, it might have slipped into a collection of gold/silver alloy by mistake.
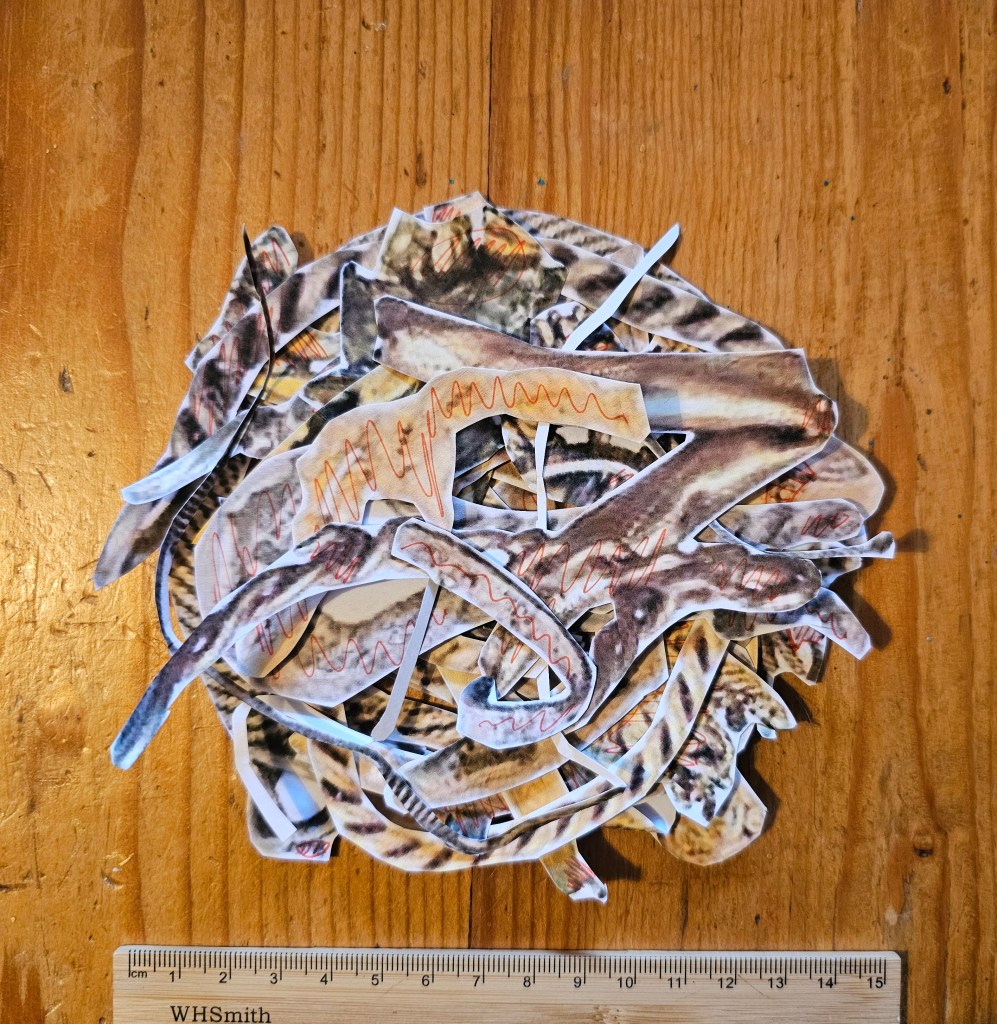
In addition to the alloy similarities, when laid out together it is immediately obvious that the majority of pieces have a similar curvature, not obviously related to their original form (Fig. 8a & b) and when placed on top of each other all but three of the Hoard F pieces fit within a circle approximately 140mm in diameter (Fig. 8c).


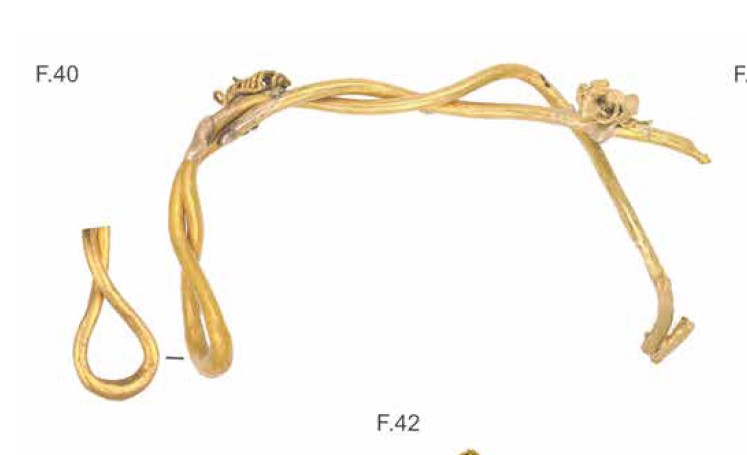
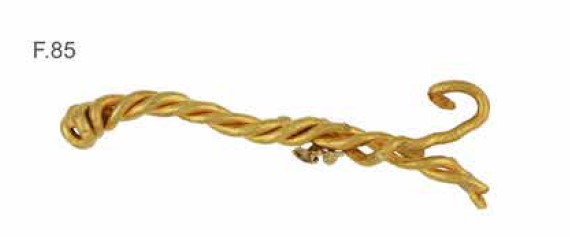
Interestingly, the three longer pieces of metal (F.39, F.40 and F.85) which do not fit the 140mm diameter size have fused, or melted, material in places which are no more than 140mm apart. (Fig. 9). As such it is possible that these three pieces were once more folded/bent when they were originally altered.
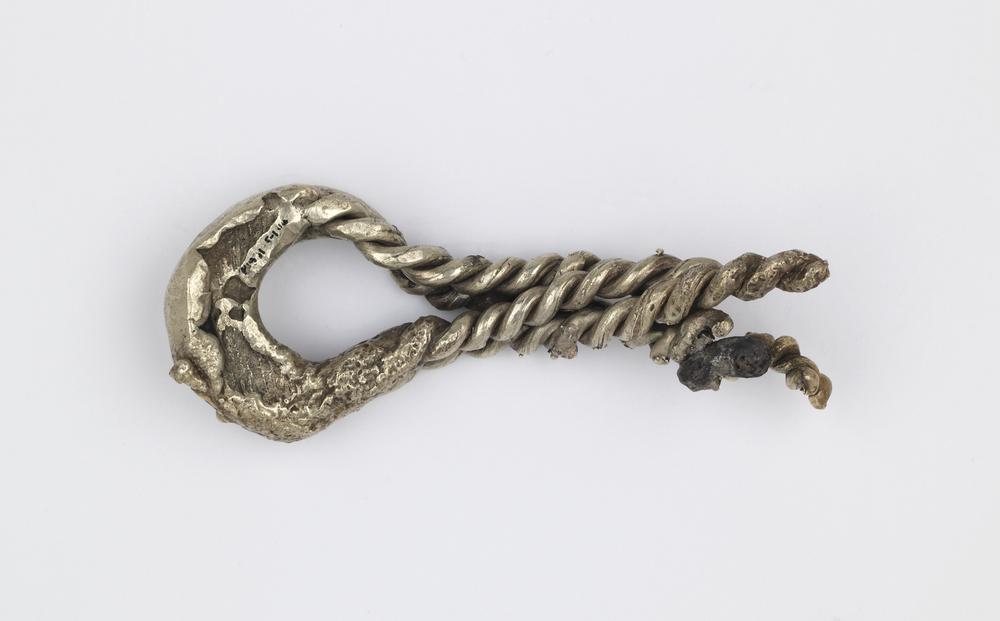
When the pieces from Hoards D, E and L are added (Fig. 10) they too fit within the 140mm diameter. In particular the part torc with a ‘cage’ terminal from Hoard L, L.15 , is a particularly good fit (Fig. 10a).
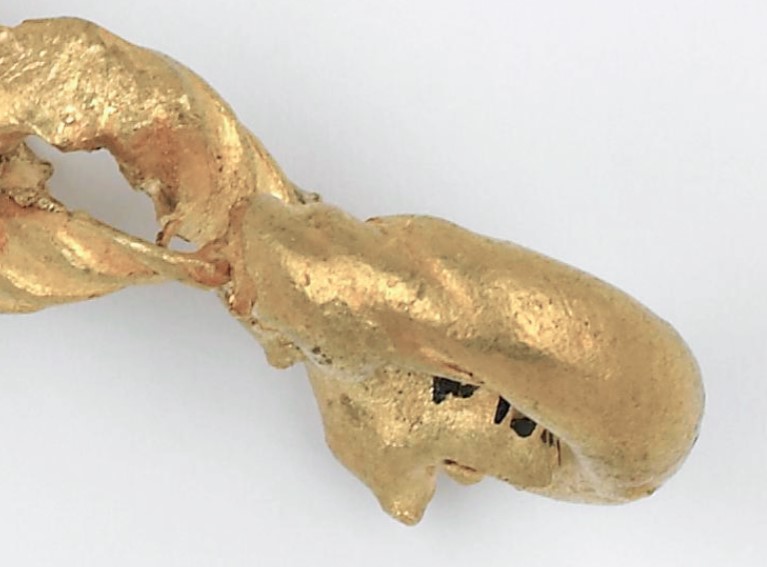
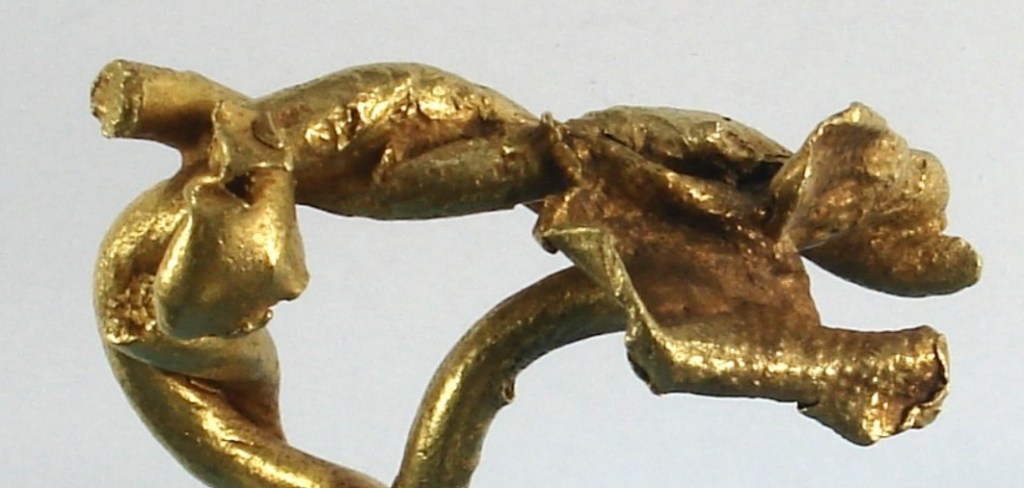
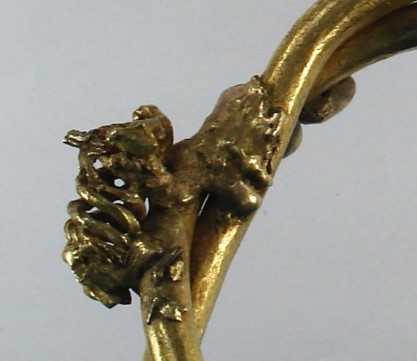
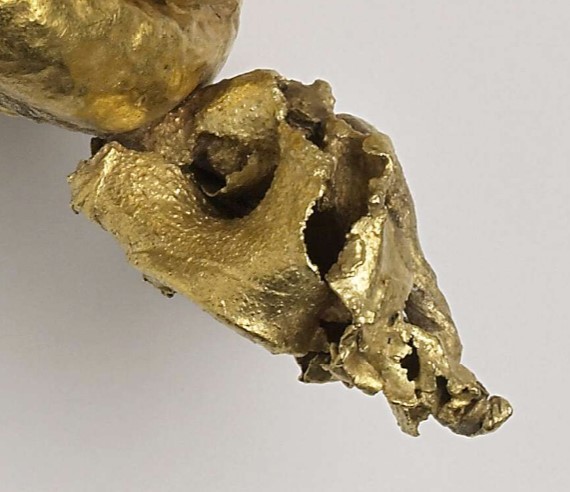
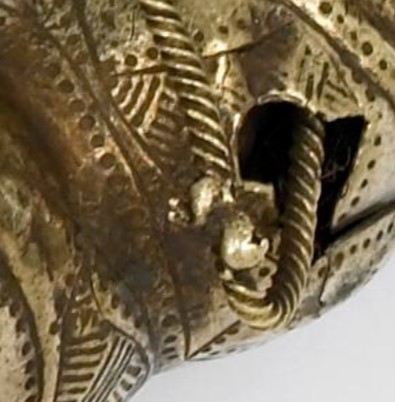
Of interest are two pieces, the only from any of the hoards, that have suffered significant melting: F.36 and F.117 (Fig. 11):
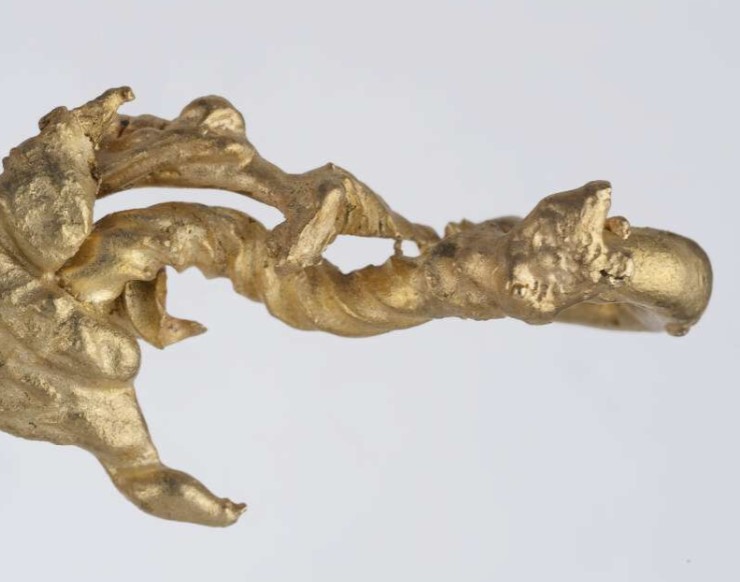
Both these pieces appear to have been heated to the point where the heating was significant enough to cause the metal to start to run. F.117 is less certain in this respect and it is possible that the present form of this terminal may be the result of a failed casting. In such a scenario, the molten alloy ‘exploded’ from the mould as it was poured, potentially due to an insufficiently dry clay mould – or gas pocket – thus causing the mould not to fill correctly and a faulty casting. However, the drips of silvery molten metal on several pieces (e.g. D.1b and F38) and the absence of any other melted silver rich alloy pieces within Hoard F, might suggest that the melting of F.117 was the origin.
The number of gold rich alloy ‘drips’ on pieces within Hoard F is not large, and it is possible that the melted portion of F.36 would have been enough to provide the drips seen on other pieces.
Summary of information
From the pieces from Hoard F, we know several things:
- Hoard F contains a mix of gold rich, silver rich and copper alloy pieces in many different forms.
- At least thirty-two of the Hoard F pieces are either fused, melted or have had molten metal dripped on them.
- There are no melted, fused or dripped on pieces from Hoards B and C – which have a very similar character to Hoard F in all other respects.
- In addition, there are three further fused, melted or dripped pieces used in Hoards D, E and L.
- The pieces from Hoards D, E and L are either incomplete (L.15) or have been used to modify other torcs (D.1b and E.1b).
- Other hoards (G, J and K) also contain broken material, which was occasionally used to modify torcs (e.g. G.5b,c,d). (N.B. some of this material may also be the result of plough damage).
- All the modifying material from Hoards D, E, G, J, K and L is very similar in character to material from Hoards B, C and F, although fused, melted or dripped on material is unique to Hoard F.
- The fused, melted or dripped on material from Hoards D, E, F and L would fit in a c.140mm diameter ‘vessel’.
Interpreting the altered material of Hoard F
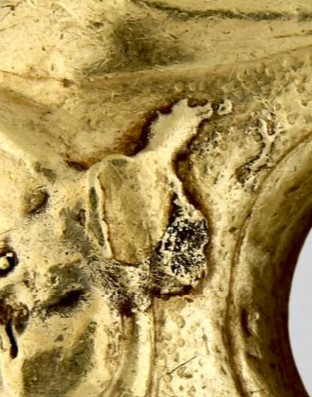
Having spoken to a number of goldsmiths, silversmiths and metal workers, the first interpretation was that the fused, melted and dripped on pieces result from a gold/silver alloy melt which either went wrong or was aborted. In this scenario, were the pieces all heated in the same batch, then it would seem that the selected gold/silver alloy pieces were folded into a crucible/vessel just over c.140mm in diameter which was then heated from the sides and the top.
As such, those pieces closest to the wall of the vessel received enough heat to fuse, and partially melt, sections of the alloy pieces. This interpretation is supported by pieces such as F.3c and, in particular, F.33 (Fig. 11) which appear to have melted ‘against’ a surface.


Pieces F.36 and F.117, as melted pieces could have sat on the top of the crucible/vessel, with the direct heat melting these two pieces and causing drips to fall onto the material below in the centre of the crucible/vessel: pieces that were not hot enough to alter themselves. The absence of material with evidence of pooling onto a surface would suggest that there was minimal heat applied from below the crucible/vessel.
It must of course be remembered that these episodes of melting could have occurred in smaller groups, over several episodes. However, the similarity of piece sizes and forms, similar melting patterns and alloys makes me think this is unlikely. Indeed, in trying to melt nearly 2.5kg of gold/silver alloy in one go they were attempting an extremely difficult task – the failed melt would again suggest that they did indeed attempt to melt all of these objects but could not gain sufficient heat to achieve it.
It has been previously argued that these composite fused objects were intentionally created (e.g. Joy et al 2024, 510), but I would disagree with this interpretation. Throughout Hoard F, only gold/silver rich alloys were included in the melt, and the fusing patterns are way too haphazard to be intentional. In addition, unlike much of the rest of later Iron Age Britain, there is extensive evidence from Snettisham of an absence of metal working skill present in the area at the time of the hoards’ depositions, with simple repairs and modifications being carried out by unskilled hands (Machling & Williamson 2020). A poorly achieved gold melt would not be out of character!
Hoard biography
If the above suggestion is accepted then we can start to put together a series of events which eventually culminated in the depositing of Hoard F, and others. These are:
- The gold/silver rich pieces were selected.
- The metals were placed in a vessel/crucible at least 140mm in diameter.
- The vessel was heated from the sides and top.
- The metal was allowed to cool.
- The fused and melted metals were prized apart.
- More gold rich, silver rich and copper alloy objects were added.
- Some of the melted and fused gold alloys were strung onto rings etc to create composite groups.
- Partial metal objects (some of which happened to be fused or melted) were added/used to modify torcs in Hoards D, E, G, J, K and L.
- The contents of Hoard F were placed within a copper alloy helmet which was then buried or the helmet was placed in the ground and then filled.
- Hoards A, B, C, D, E, G, H, J, K, L etc were buried.
These events could have taken place contemporaneously, or could have happened with large, or small, intermissions between each episode. My feeling, as I’ve argued before (Machling & Williamson 2020) is that the Snettisham hoards were all buried at around the same time and the similar character of the broken and fused and melted material found within many of the hoards would support this.
However, I do think it is possible that the melting of the Hoard F material could have occurred away from Snettisham, with the contents of the hoard (and indeed the contents of Hoards B and C) brought to the site in the assemblage that they were found in, and perhaps even carried in the helmet.
It would appear that the contents of Hoard F (and probably Hoards B and C) were raided for materials to adapt, repair and modify torcs in other hoards. The presence of the melted, fused and dripped on material from Hoard F in Hoards D, E and L leaves me in little doubt that this was the case. As such we should see the Snettisham hoards as contemporary: the material carefully selected for each hoard according to a number of criteria.
But more of that to come soon…
In the meantime, do sign up below to receive notifications of new posts and, as ever, it’s always good to torc, so do get in touch!
Acknowledgements
My grateful thanks go to (in alphabetical order!) Hamish Bowie, Patrick Conlin, Bob Davies, George Easton, Giovanna Fregni, Louis Garcia, Betty Lo, David Loepp, Kurt Ronnkvist, Hayden Scott-Pratt, Rowan Taylor and Jeroen Zuiderwijk who offered thoughts on all things fused, melted and splattered – of course, all errors and omissions are entirely mine!
References
Farley, J. 2024. Excavation of the torcs recovered in 1990-1991. In Farley, J & Joy, J. (eds). The Snettisham Hoards. British Museum Research Publication 225, 123-147. London: The British Museum Press.
Joy, J; Meeks, N. & Farley, J. 2024. Torc Biographies. In Farley, J & Joy, J. (eds). The Snettisham Hoards. British Museum Research Publication 225, 498-513. London: The British Museum Press.
Machling, T. & Williamson, R. 2020. Thoughts on the Grotesque torc and the Snettisham (Ken Hill) hoards in the light of new research. https://bigbookoftorcs.com/2020/09/22/thoughts-on-the-grotesque-torc/
Machling, T. & Williamson, R. 2023. Beyond Snettisham: a reassessment of gold alloy torcs from Iron Age Britain and Ireland. Pre-print available online: https://bigbookoftorcs.com/2023/06/23/beyond-snettisham-a-reassessment-of-gold-alloy-torcs-from-iron-age-britain-and-ireland/
Meeks, N; Mongiatti, A; O’Flynn D & Fenn, J. 2024. Technology and manufacture of the Snettisham torcs. In Farley, J & Joy, J. (eds). The Snettisham Hoards. British Museum Research Publication 225, 419-477. London: The British Museum Press.
Stead, I. 2024. Excavating at Snettisham. In Farley, J & Joy, J. (eds). The Snettisham Hoards. British Museum Research Publication 225, 8-14. London: The British Museum Press.

One Reply to “”